
About Bhasini
“Bhashini” is a project or initiative aimed at providing easy access to the Internet and digital services for all Indians in their native languages. The primary goal of the project appears to be increasing the amount of content available in Indian languages, thereby promoting digital inclusivity and accessibility for a broader population.
Functionality covered
- Speech to text: Get the text output of the voice notes shared by the users, in indic languages covered by the Bhashini platform
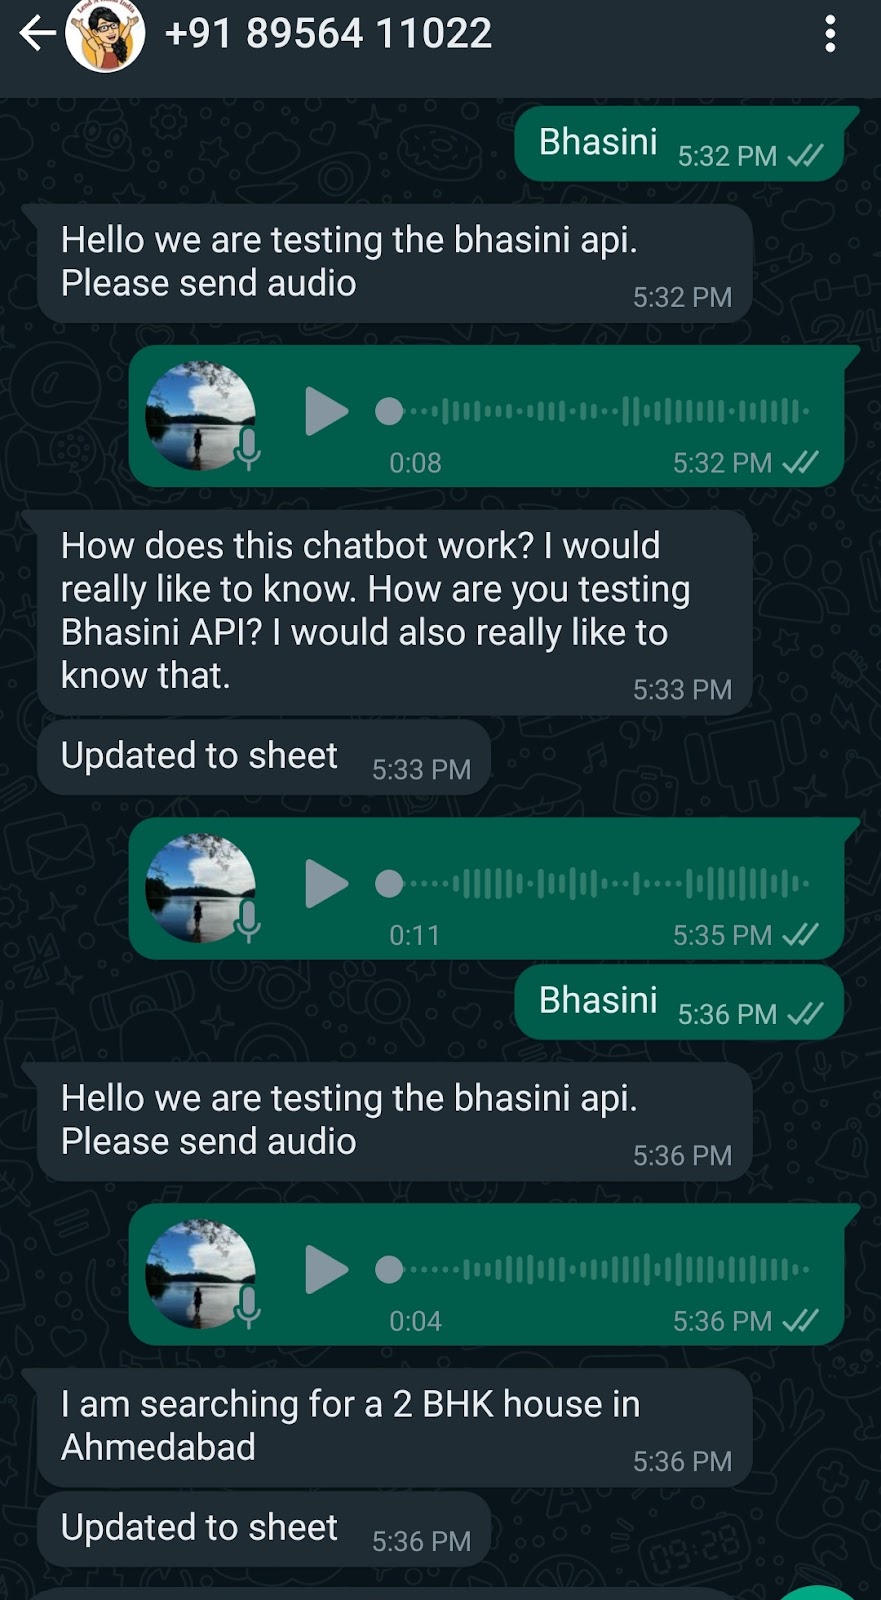
Example Flow: Bhasini api test flow
Steps to follow
STEP 1.
Acquire your bhasini user id, api key and other relevant information
https://bhashini.gov.in/ulca/user/register#
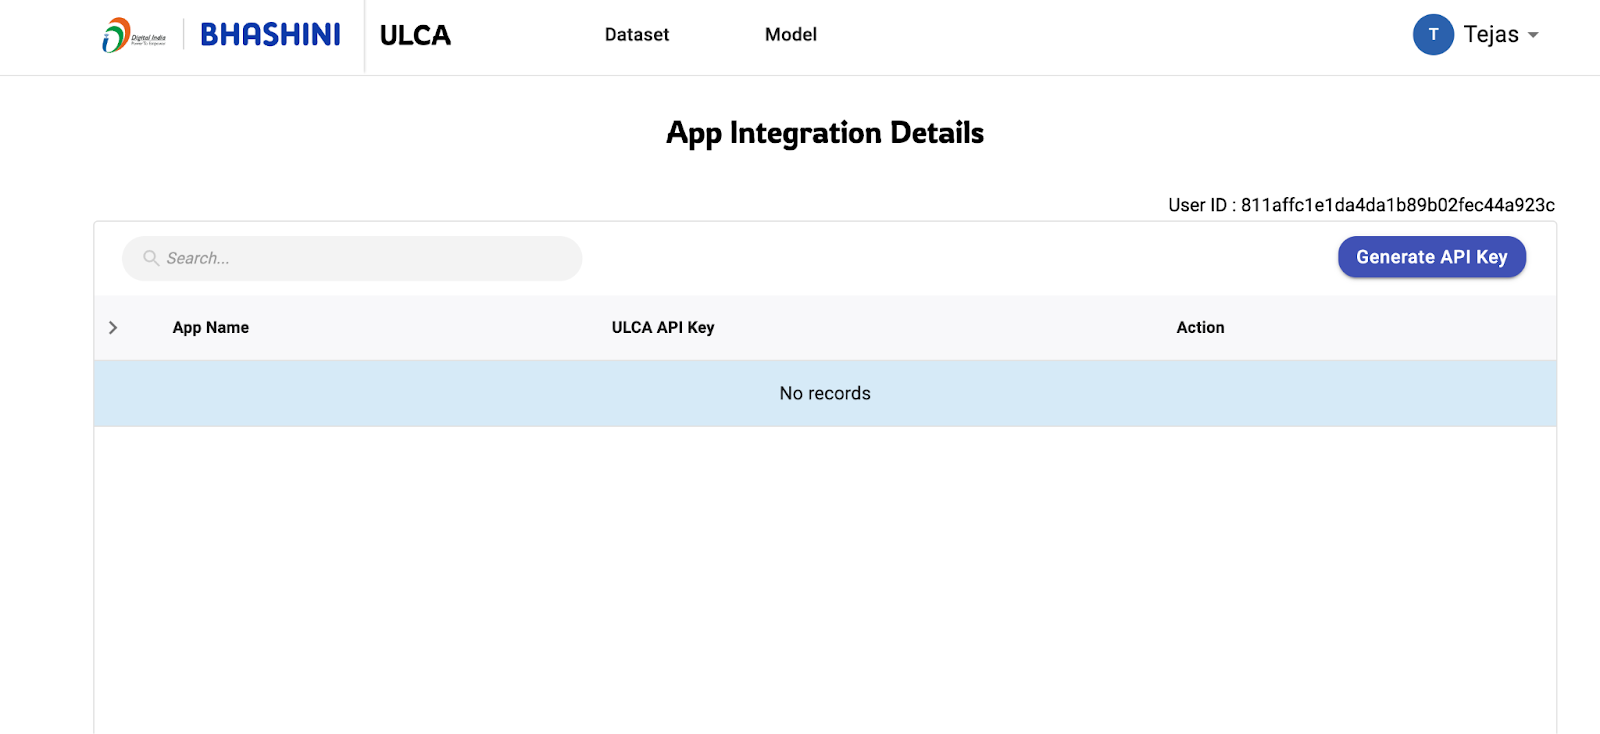
Go to my profile after logging in , here you can find
- User id
- Generate API key and get the ULCA Api key
STEP 2.
In your flow, to use the Bhashini API
- Use the “call webhook” node in Glific
- Select “Function” and enter “speech_to_text_with_bhasini”

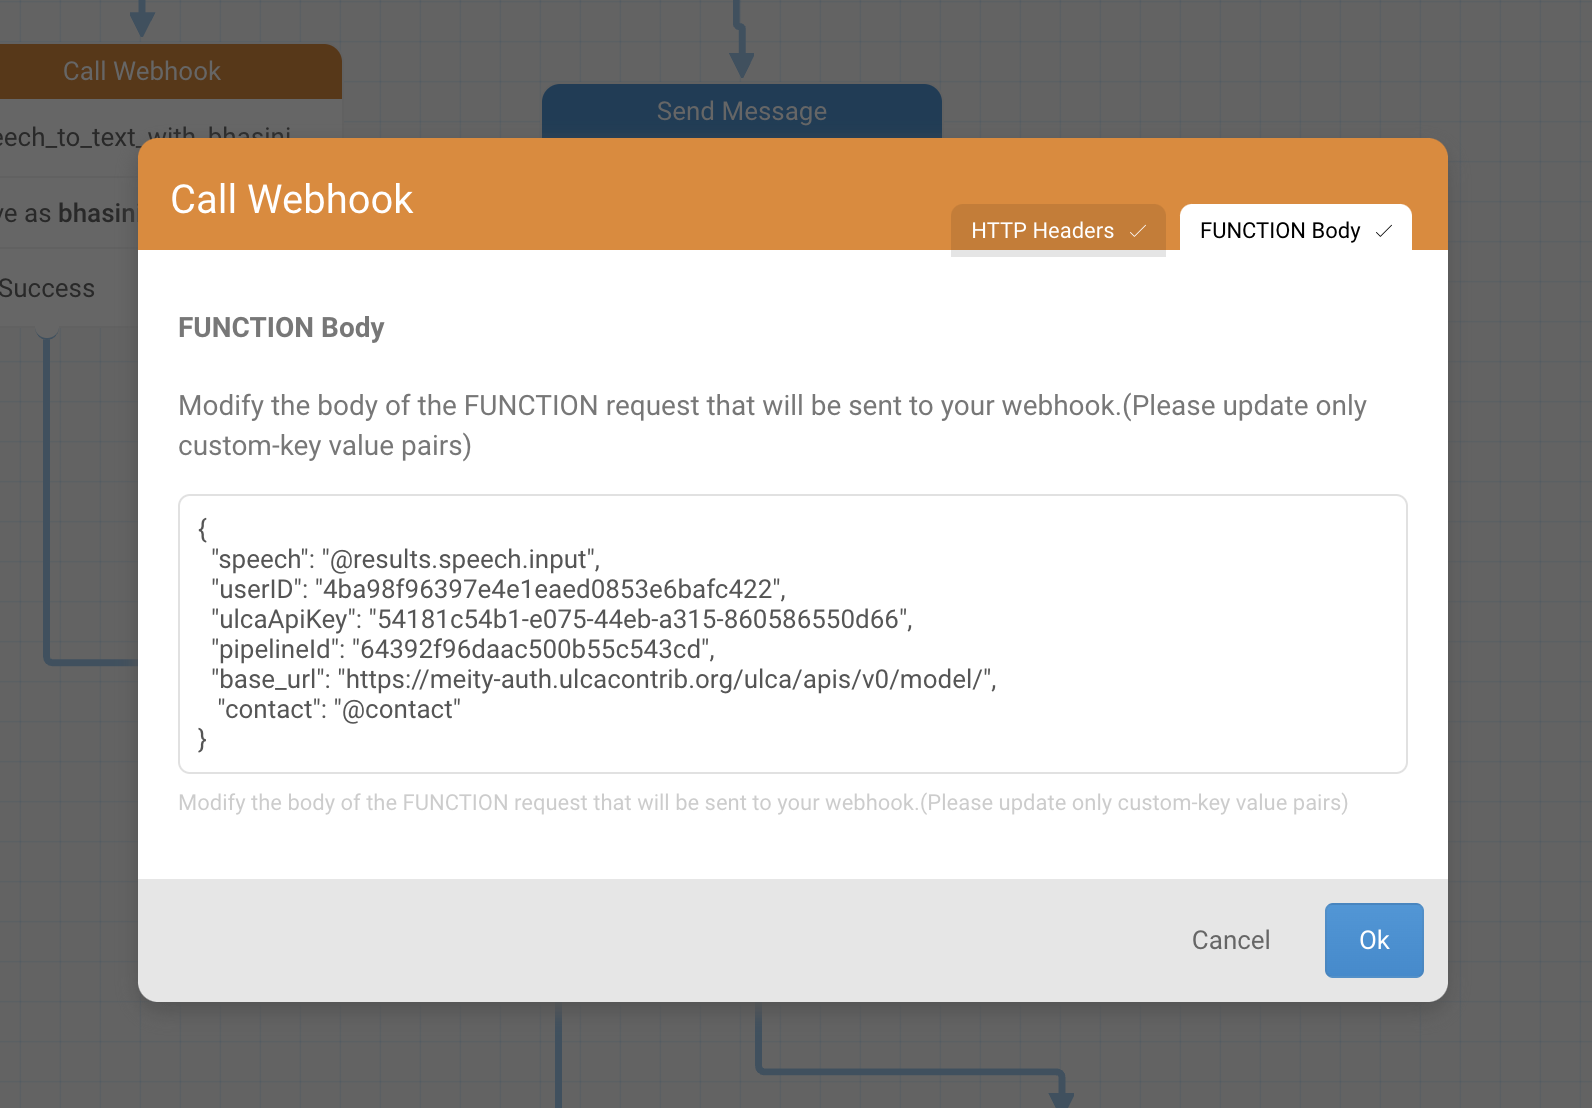
See the example of json to be sent.
- Details on the variables “User id”, “ulca api key”, “pipeline id”, “base url” documented here: https://bhashini.gitbook.io/bhashini-apis/
- “speech” variables contains the response by the user
- “contact” variable use as is.
How the “speech_to_text_with_bhashini” function works.
- The output of the text response from the bhashini depends on the language preference of the user. Ex if a user has selected hindi language, the response output from the glific will be in Hindi script.
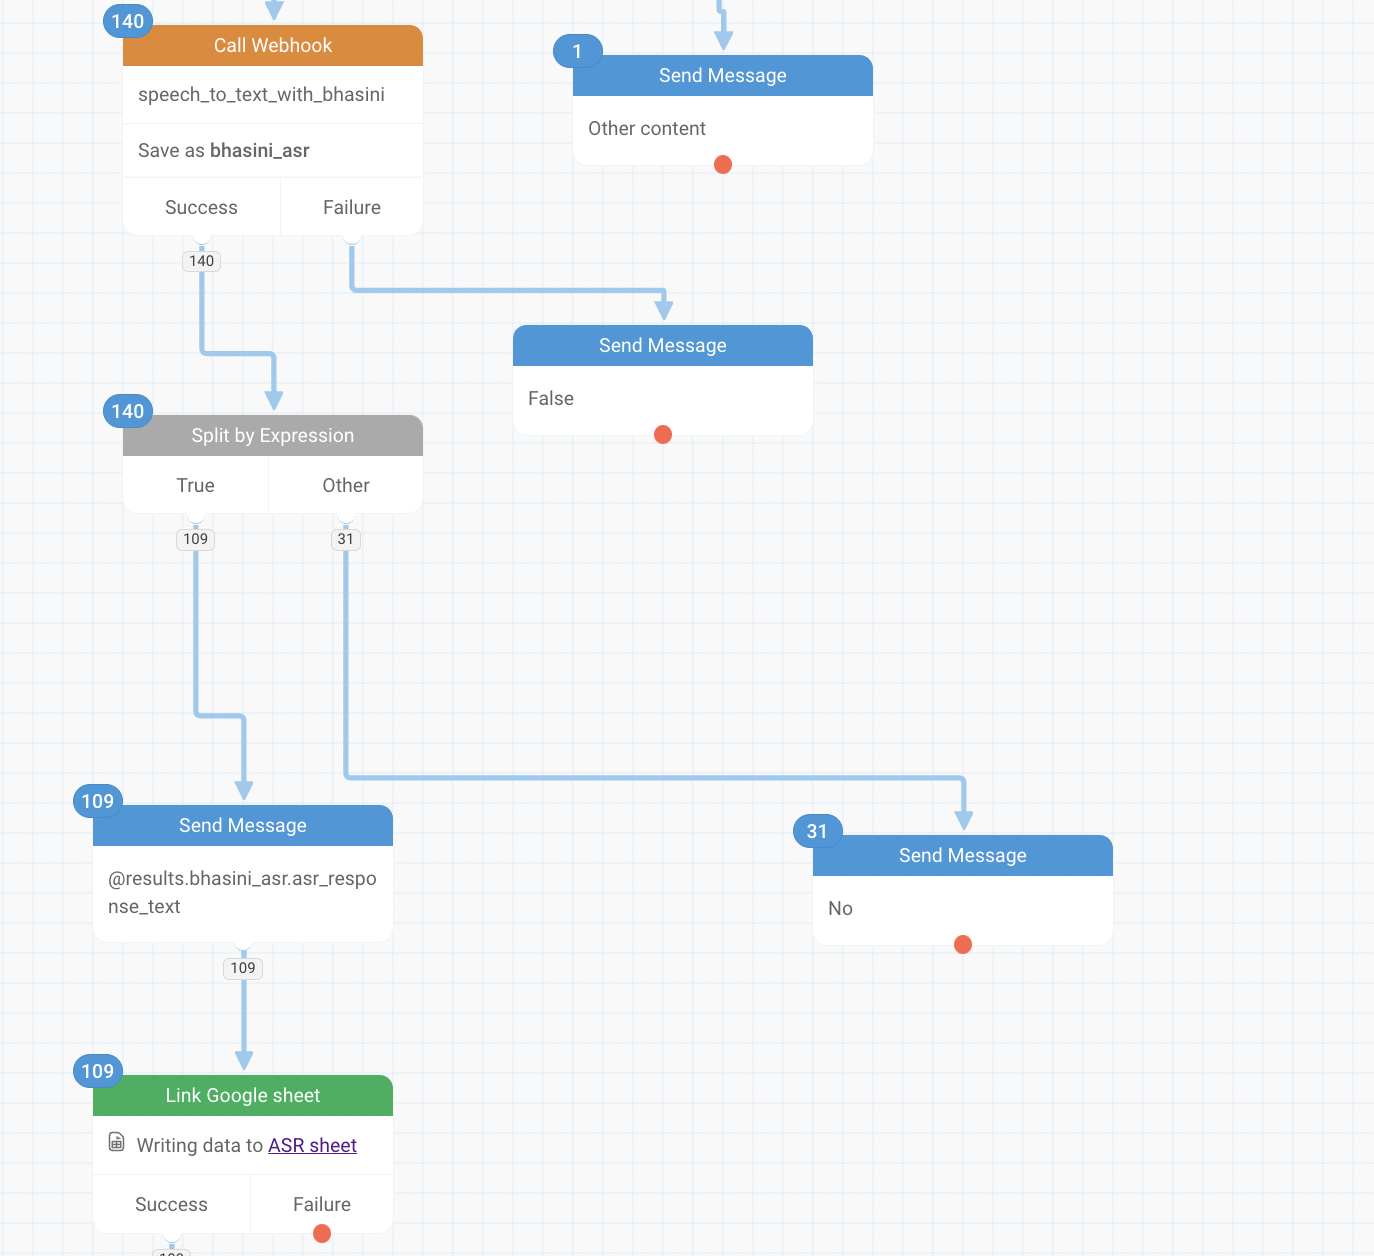
Look at abobe webhook call in the above image that does a powerful job. It takes audio and turns it into text, all thanks to a few specific instructions. Let’s take a closer look at the parts that make it tick:
So as per above image, it’s simple webhook call, in which we are using these function parameters as mention above
{
“speech”: “@results.speech.input”,
“userID”: “4ba98f96397e4e1eaed0853e6bafc422”,
“ulcaApiKey”: “54181c54b1-e075-44eb-a315-860586550d66”,
“pipelineId”: “64392f96daac500b55c543cd”,
“base_url”: “https://meity-auth.ulcacontrib.org/ulca/apis/v0/model/”,
“contact”: “@contact”
}
Breaking Down the Parts:
speech: This is where the magic happens. It takes the input audio (referenced as @results.speech.input) and transforms it into text through the process.
userID: Think of it as a digital fingerprint (“4ba98f96397e4e1eaed0853e6bafc422”) that helps keep track of where the data is coming from.
ulcaApiKey: Like a secret code (“54181c54b1-e075-44eb-a315-860586550d66”) that ensures secure communication with the ULCA service.
pipelineId: This ID (“64392f96daac500b55c543cd”) tells the system which pathway to follow within the ULCA framework.
base_url: The starting point, or URL (“https://meity-auth.ulcacontrib.org/ulca/apis/v0/model/”), for accessing ULCA’s model APIs.
contact: Just like a phone number, @contact provides a way to get in touch if needed.
Once the webhook call is triggered, the real action begins. The audio becomes text right in front of you. This new text is then neatly added to a Google Sheets document for safekeeping and future reference.
Leave a Reply